How to Make an Easy Handmade Little Book
How to Make a Handmade Book
I love developing a wide variety of creative DIY projects—everything from fashion to beauty to crafts!
DIY handmade book.
DIY Craft: How to Make a Book
I have to admit this: Doing this craft was a bit difficult. I started with little idea of how to start because the information I found online was too confusing. I took the basic concepts and went crazy with it—in the end, it turned out great! I'll try to keep you from making my mistakes, and hopefully, you'll have awesome little books by the end!
What You'll Need
- Paper: I used watercolor paper because it's a bit thicker. In all, I used four sheets, which yielded 16 pages.
- Cardboard: Choose something that is thick but not too thick, like the cardboard from a shoe box or cereal box.
- Decorative Paper: Use this to decorate your cover!
- Painter's Tape: Blue painter's tape worked with my book's colors, but if you don't like the blue, you can always paint over it with acrylic paint.
- Rubber Cement: I didn't have this available, so I used plain glue. Ideally, I'd use rubber cement because it doesn't make the paper wrinkle so much.
- Needle and Thread or Stapler: I was going for the traditional bookbinding method, but to be honest, a stapler would've been easier. Go with what you like!
Prepare the pages.
1. Prepare the Pages
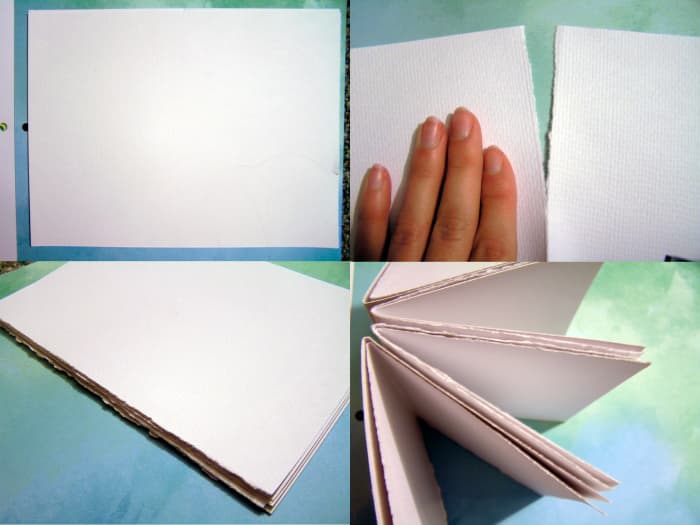
As I mentioned before, I used watercolor paper to make the body of the book. I like the organic edge, so I tore the paper instead of cutting it.
- Take each sheet individually in portrait orientation, and fold them horizontally through the middle. Then, fold it back the other way to make tearing easier. Next, lay the sheet of paper down flat and tear it down in the middle.
- Once you've torn all the sheets, take two and fold them down the middle. This will create one signature. A signature in a book is a group of pages that are all bound together. A collection of signatures creates a book! You can't just put all of your pages in one giant signature because when they're folded up, they won't look even. I used four signatures in my book.
Next, bind the pages.
2. Bind the Pages
The Easy Method:
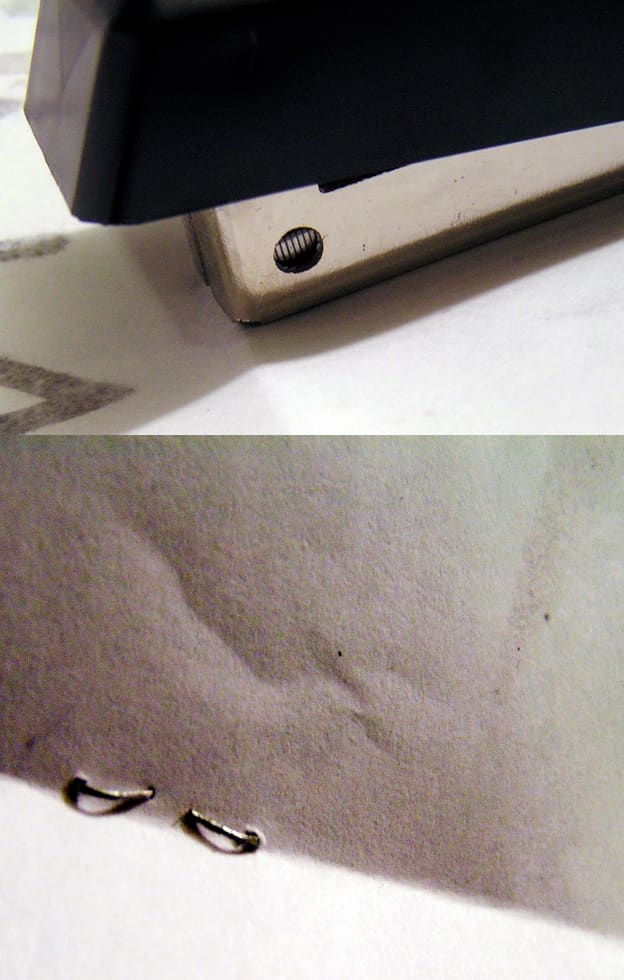
If you want to do this the easy way, use a stapler.
- Take one of your signatures and unfold it, leaving the sheets stacked.
- Grab your Swingline stapler and pull the top part from the bottom.
- Place your unfolded sheets on a hard surface that can't be penetrated by a staple.
- Line the stapler up on top of the middle fold.
- Staple through at the top, bottom, and middle of the fold.
Sewn-Binding Method:
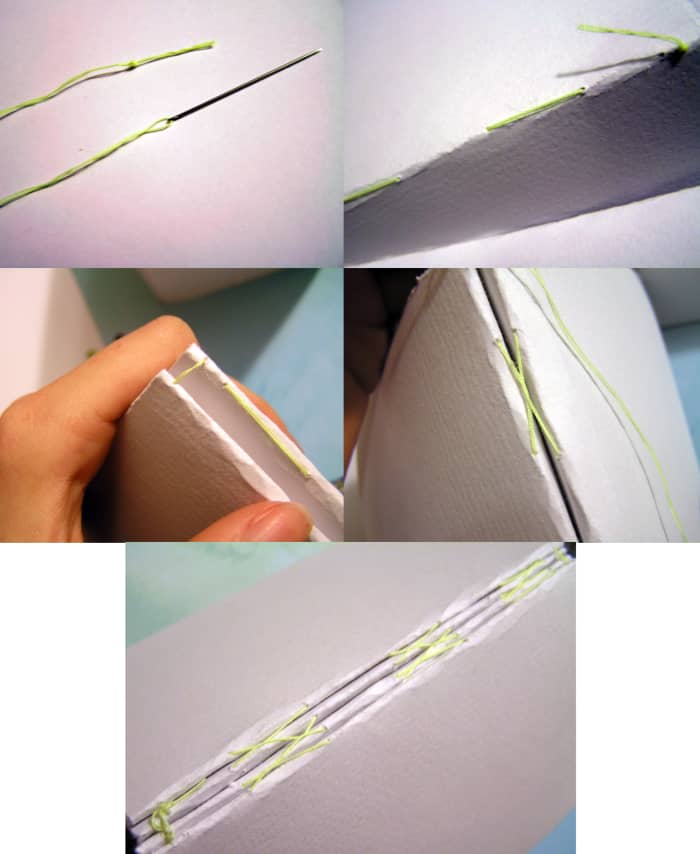
If you prefer the look of a sewn binding, grab your needle and thread.
- Cut a large amount of thread, as you'll want to double it up while you're sewing. Thread your needle and pull it to the very middle of the string. Tie the two ends together in a double-knot.
- One of my mistakes was binding with no rhyme or reason. I'll explain what I did, which worked, but I'm also going to let you know how a real bookbinder does it!
- Start with the top of the first signature, threading from the back to the inside of the middle fold. Continue this to the bottom of the signature, weaving at about 1" intervals. Once you're at the bottom, grab another signature and line it up with the first. I did the same sort of sewing pattern, but I crossed the threads along the spine. My intention was to keep it all held together.
- I proceeded the same way until all of the signatures were added. Then, I tied off the end and cut the excess string.
Now, you'll want to prepare the cover.
3. Prepare the Cover
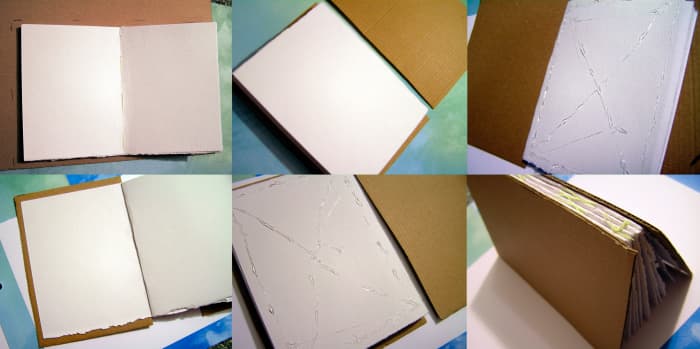
Cut out a piece of cardboard that is about two centimeters wider and four centimeters taller than your opened book. Cut it in half to create your front and back covers.
Take your front cover and glue it to the first page of your book. The cardboard should have a 1-cm border around the top, bottom, and left sides of the page. Repeat this with the back cover!
Next, you'll want to complete the cover.
Scroll to Continue
Read More From Feltmagnet
4. Complete the Cover
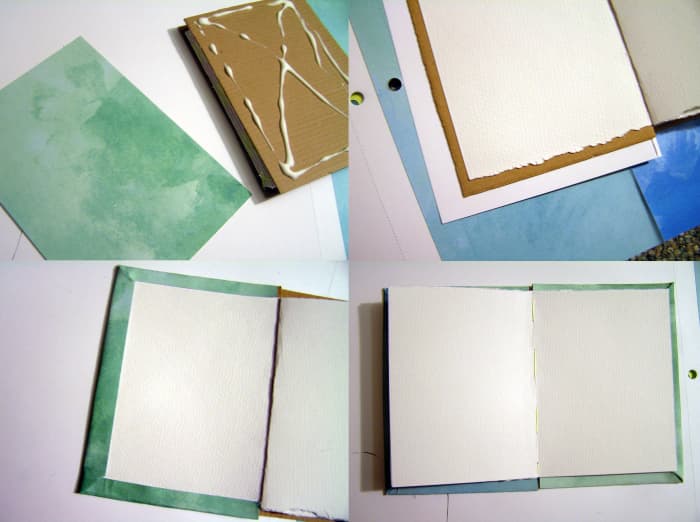
Now it's time to decorate the cover. I used a sheet of 12"x12" scrapbooking paper.
- Open up your book and lay it on top of the paper so you can trace how large to cut the decorative paper.
- Cut the decorative paper about 4 centimeters wider and taller than your naked book: 2 centimeters extra on each side. Once you've cut it out, go ahead and cut the sheet in half.
- Take one half and glue it to your front cover. You should have a 2cm border around the top, bottom, and left side of the cardboard. Fold these edges over like you're wrapping a gift and glue them down! They should just cover the edges of the page.
- Do the same thing with the back cover. It should extend 2cm around the top, bottom, and right side of the cardboard. Fold the edges, and glue.
Complete the binding.
5. Complete the Binding
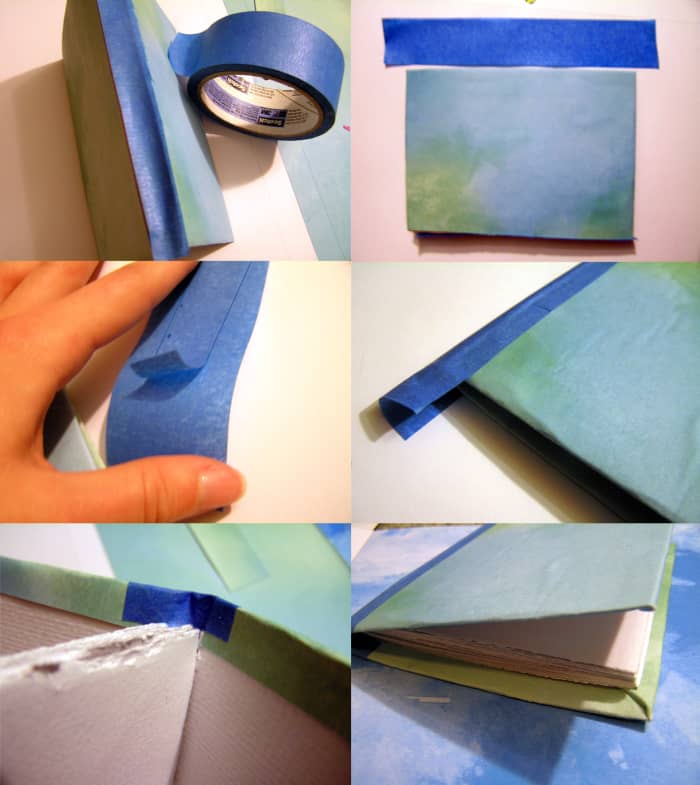
Find your painter's tape, and cut a strip that is the exact height and width of your book's binding. Then, tear off a strip that's a few inches longer than the binding.
- Stick the first strip to the sticky side of the larger strip, right in the middle. Then, place the larger strip right over the binding of the book. It shouldn't stick to the binding, but it should stick to the front and back covers of the book.
- Since the piece of tape is taller than the book, you'll have some excess tape on the top and bottom. Simply fold it over—you may have to cut a bit off to do this.
There you have it—a completed book made by hand!
Now, you can turn your book into something special.
Turn the Book Into Something Special
I sincerely hope you enjoyed this craft and that it wasn't too difficult to understand! Please let me know if you need some clarification on the steps. Since I used watercolor paper on mine, I was thinking of making it a little watercolor sketchbook. They could also be used as a scrapbook, perhaps to display old movie ticket stubs. With some more pages, it could also make for a nice journal!
Thank you for reading!
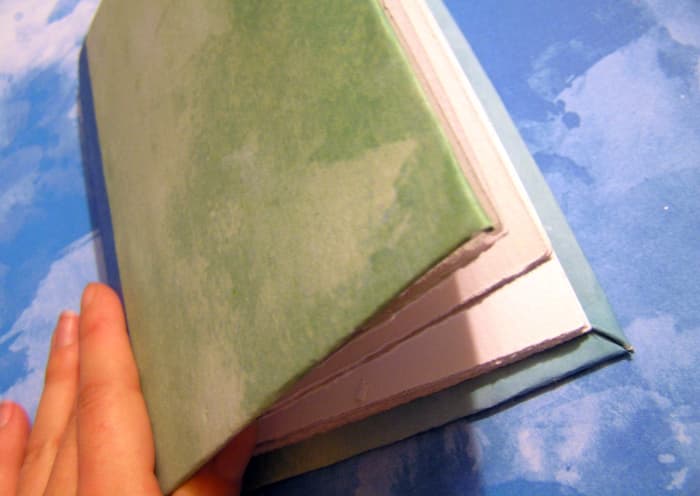
Enjoy your completed handmade book.
Cali Prince on February 28, 2019:
this is awesome thank u!!!
Alex Rose (author) from Virginia on January 29, 2014:
Great! Glad you understood what I was saying - I wasn't sure if my directions were clear enough, so I just took tons of pictures :) You can of course leave the binding uncovered to make the project quicker, but I prefer it covered over!
Donna Herron from USA on January 29, 2014:
Great tutorial - very easy to understand. I've seen these handmade books and they've always looked so complicated, but your directions and photos make it seem easier than I imagined :) Will have to try this! I love pretty decorative paper and this project seems like a great way to use it! Thanks!!
Source: https://feltmagnet.com/crafts/DIY-Crafts-How-to-Make-a-Handmade-Book
0 Response to "How to Make an Easy Handmade Little Book"
Post a Comment